To begin this process, the first thing you want to do is make sure you are on the Organize tab. From there, select the Rename Files function.
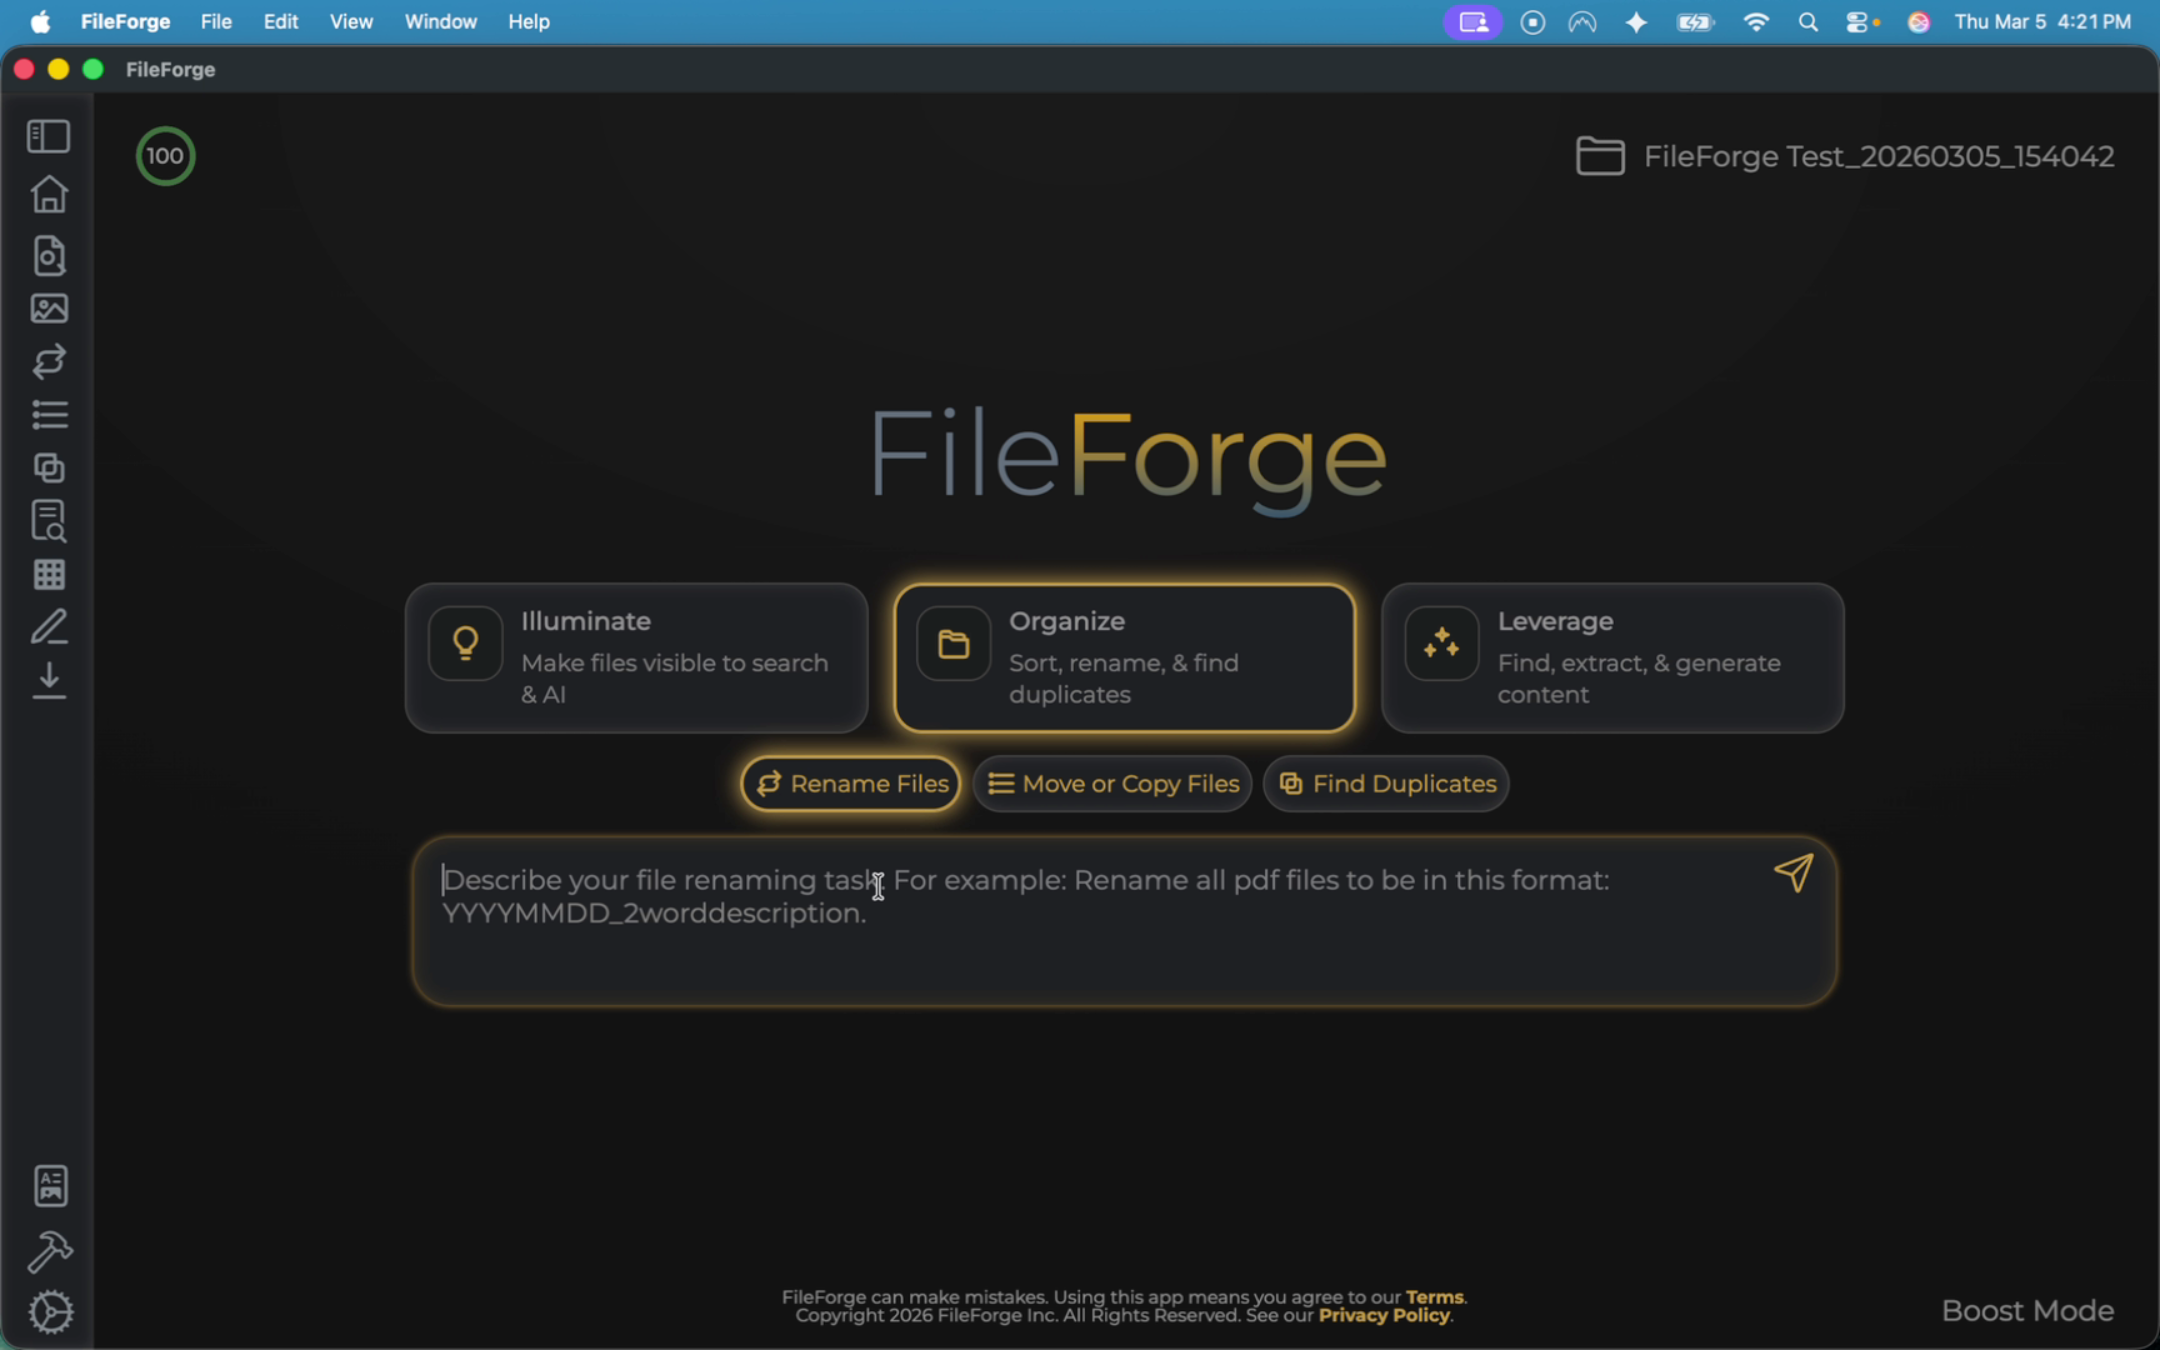
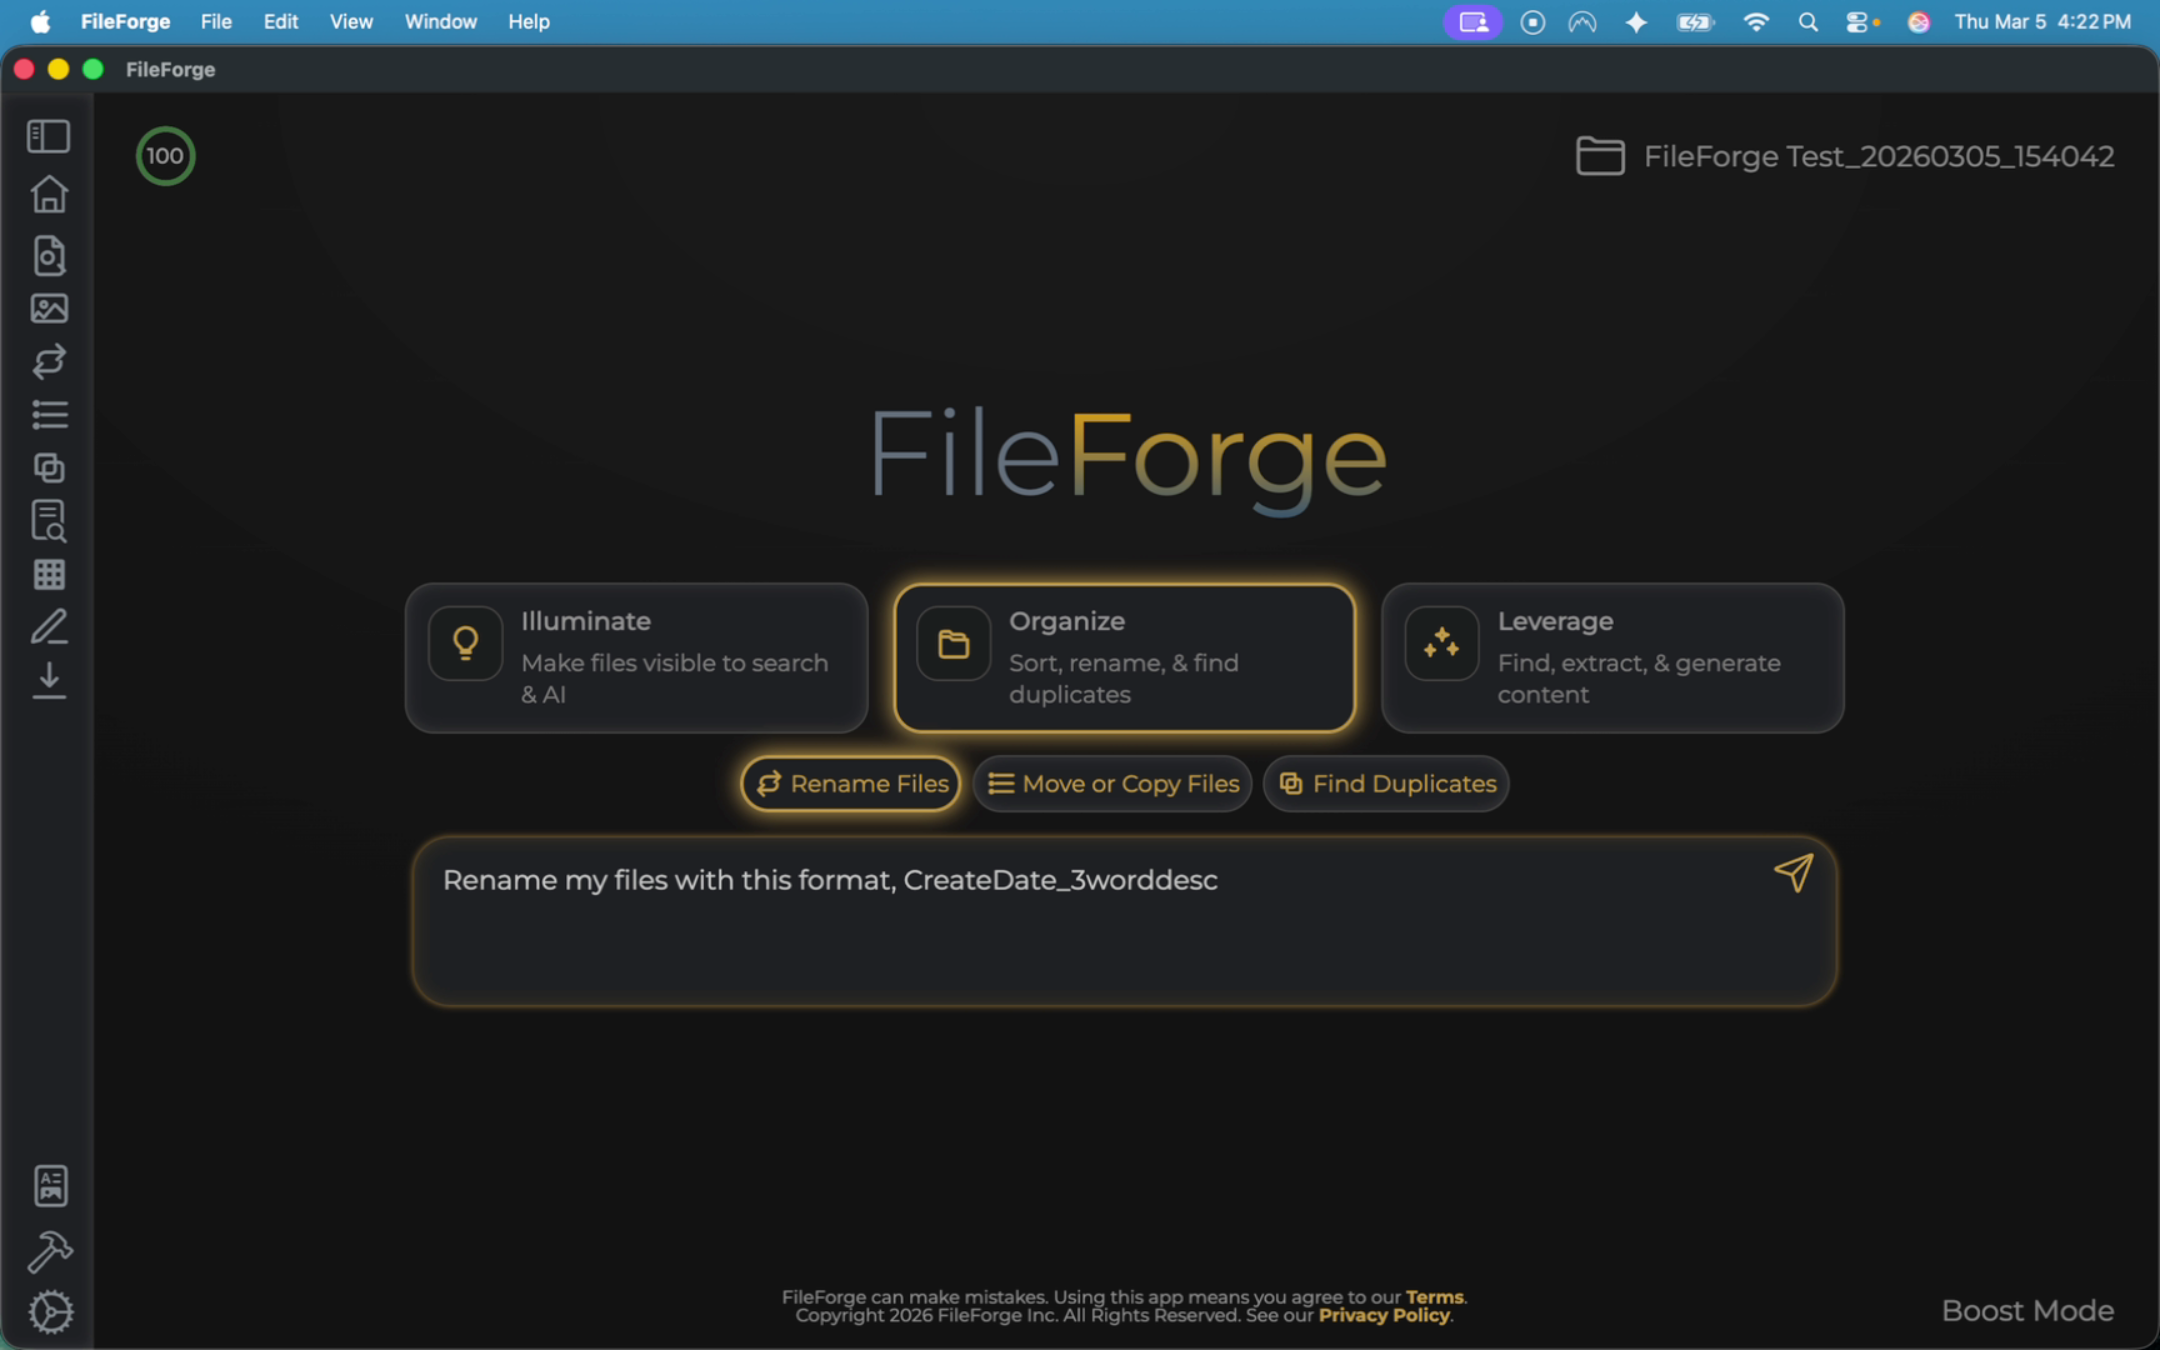
Provide instructions of how you want your files to be renamed.
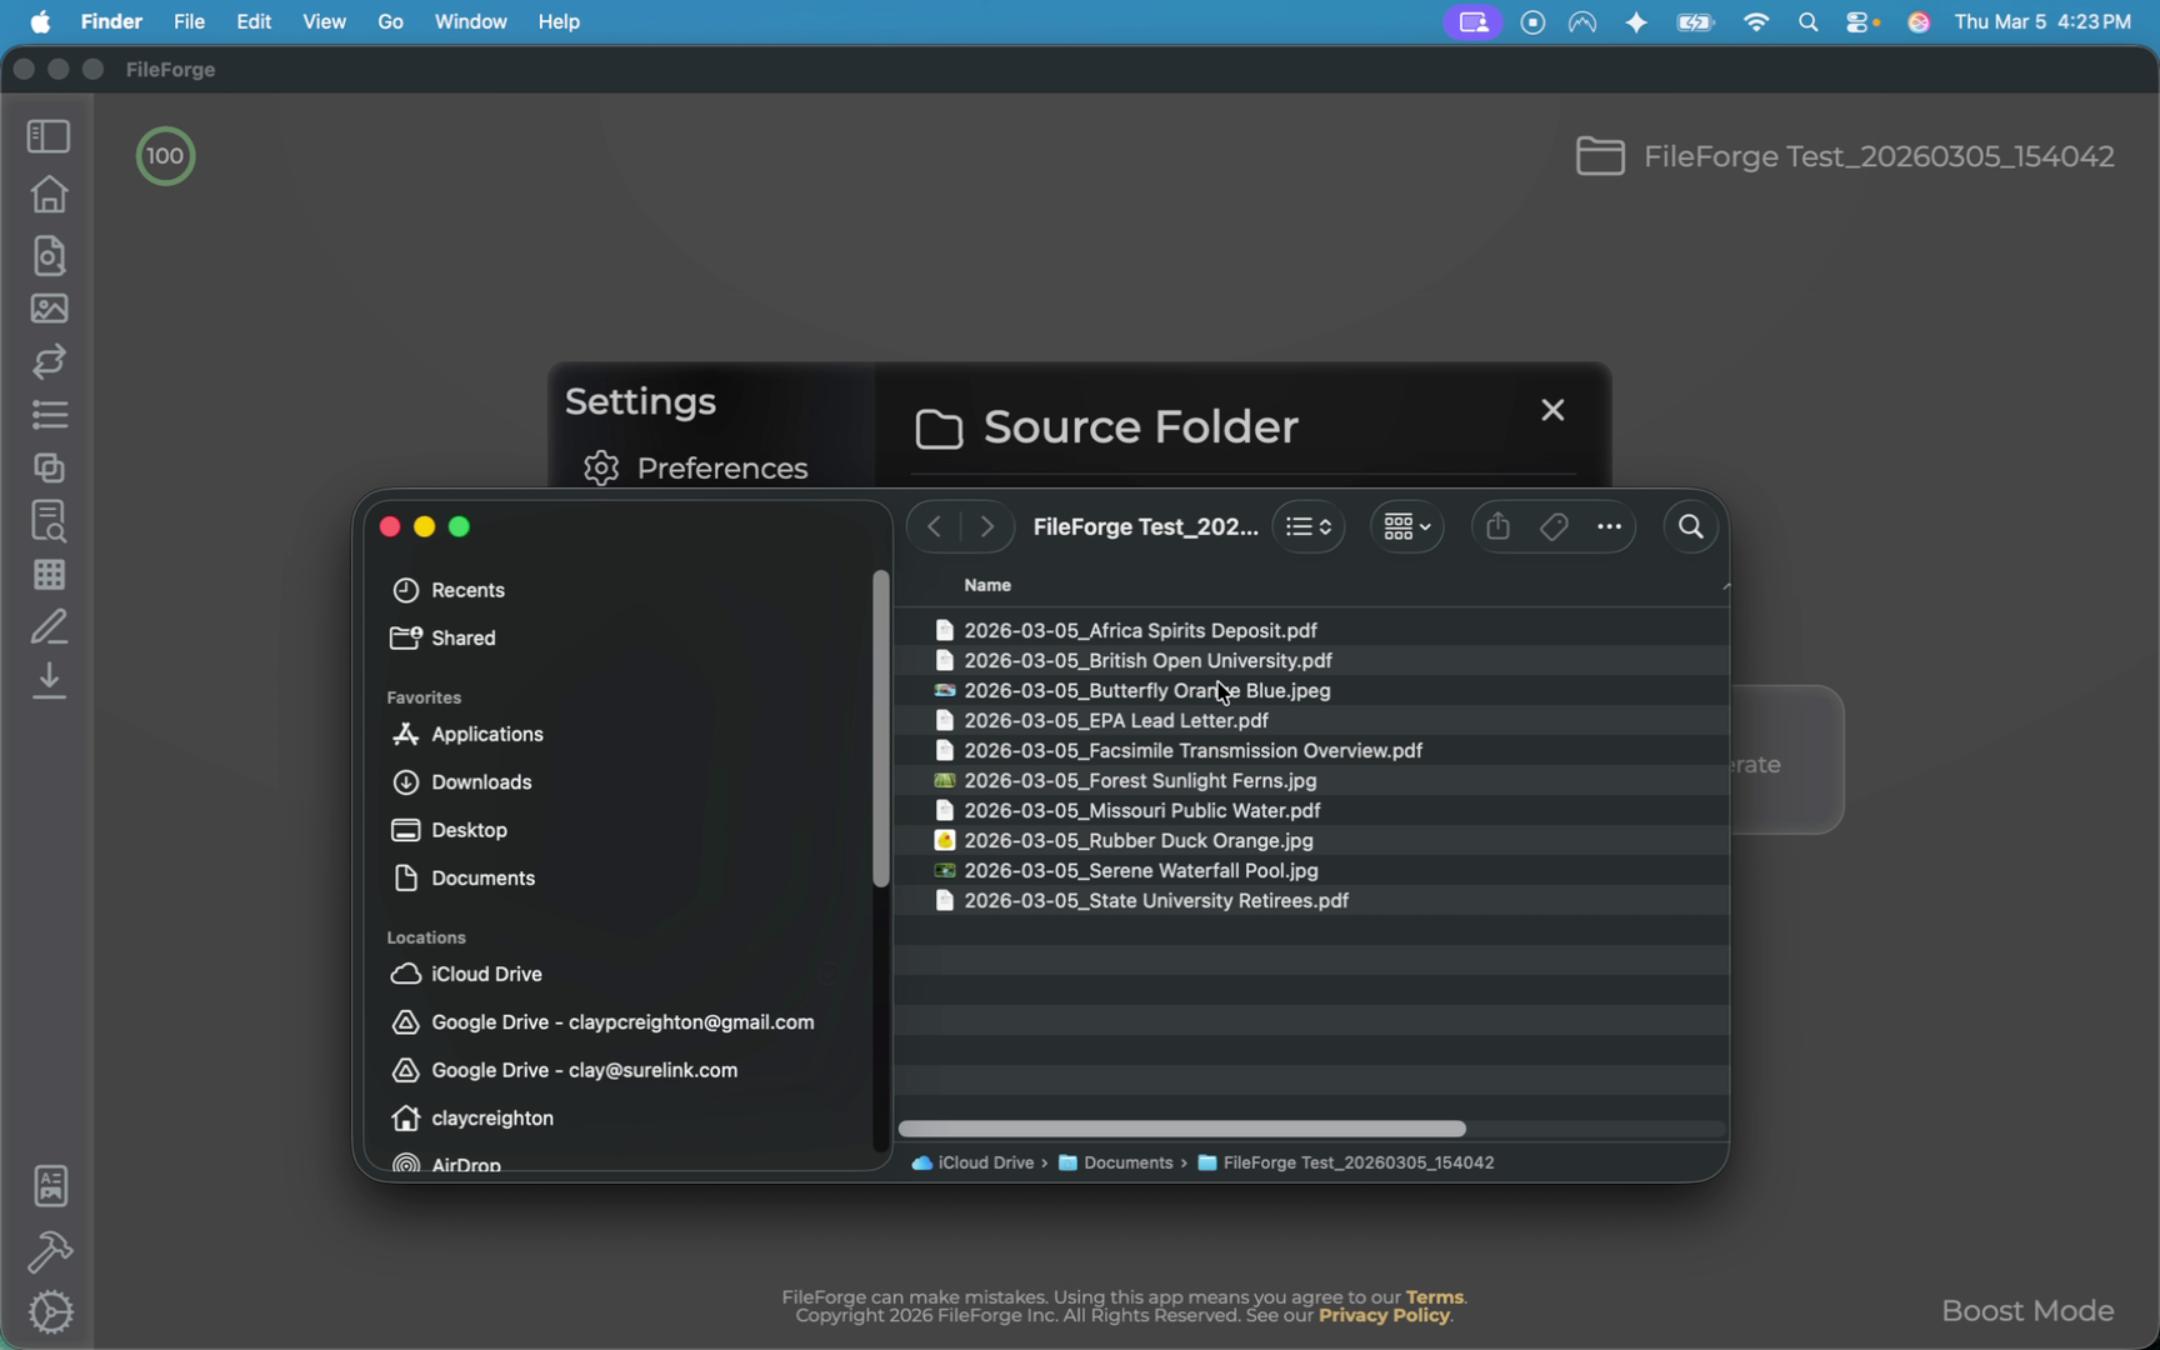
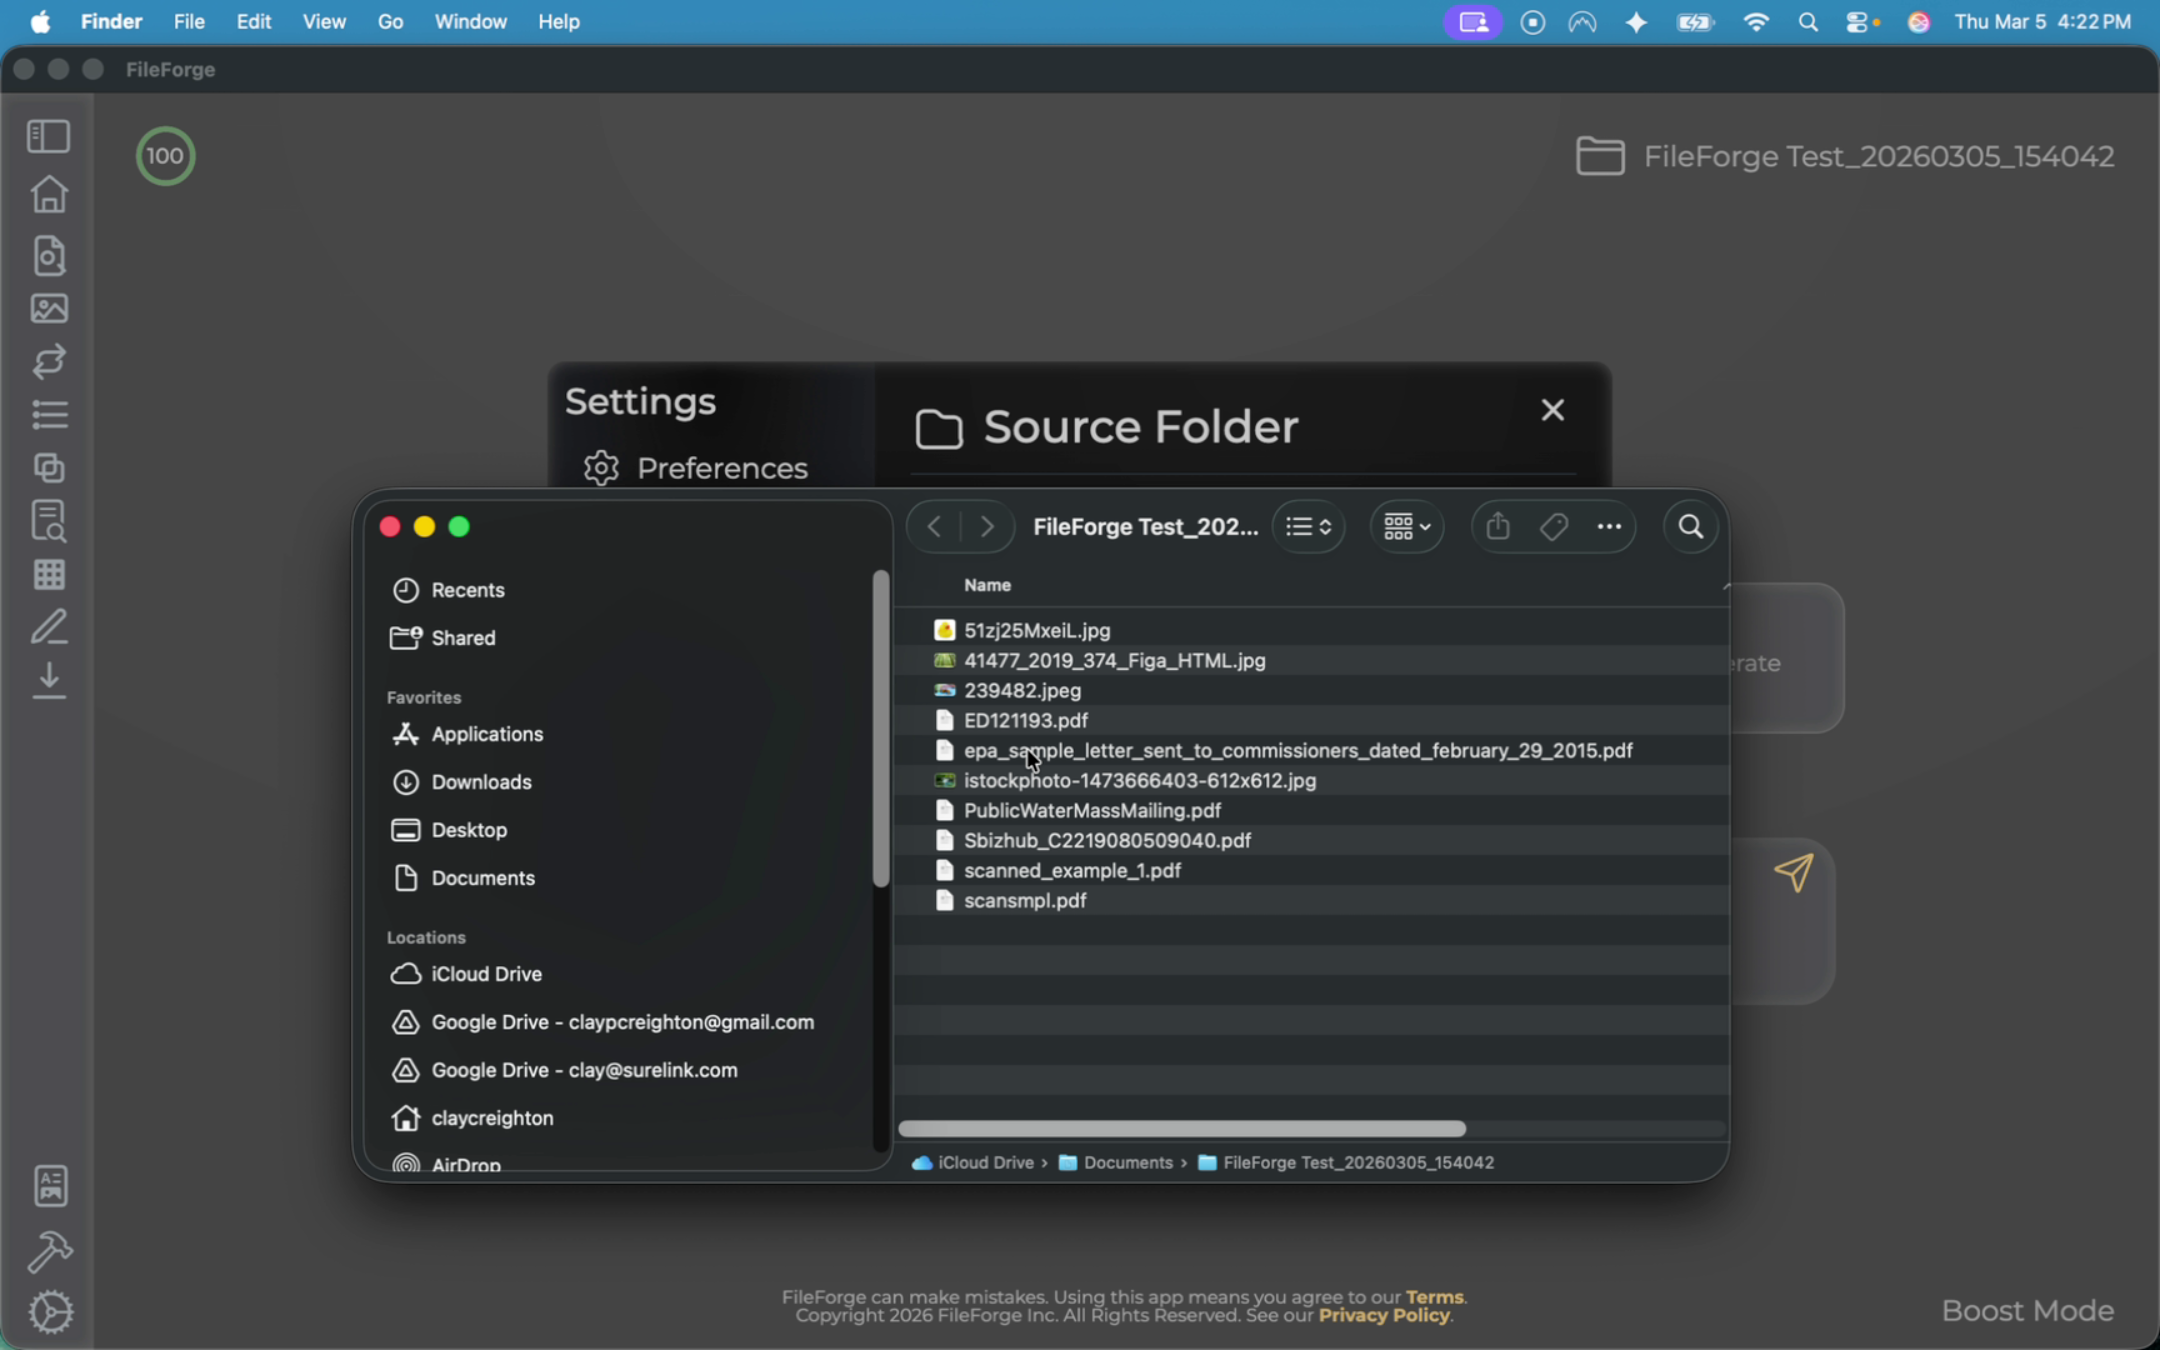
Now before we run this, let's take a look at what the file names currently look like. If you select your folder and open it, you can see many files have generic names or contain a series of characters and numbers. So the goal with this is to let the FileForge system go through and rename these files to something human readable and AI readable. Let's close this window and run your prompt.
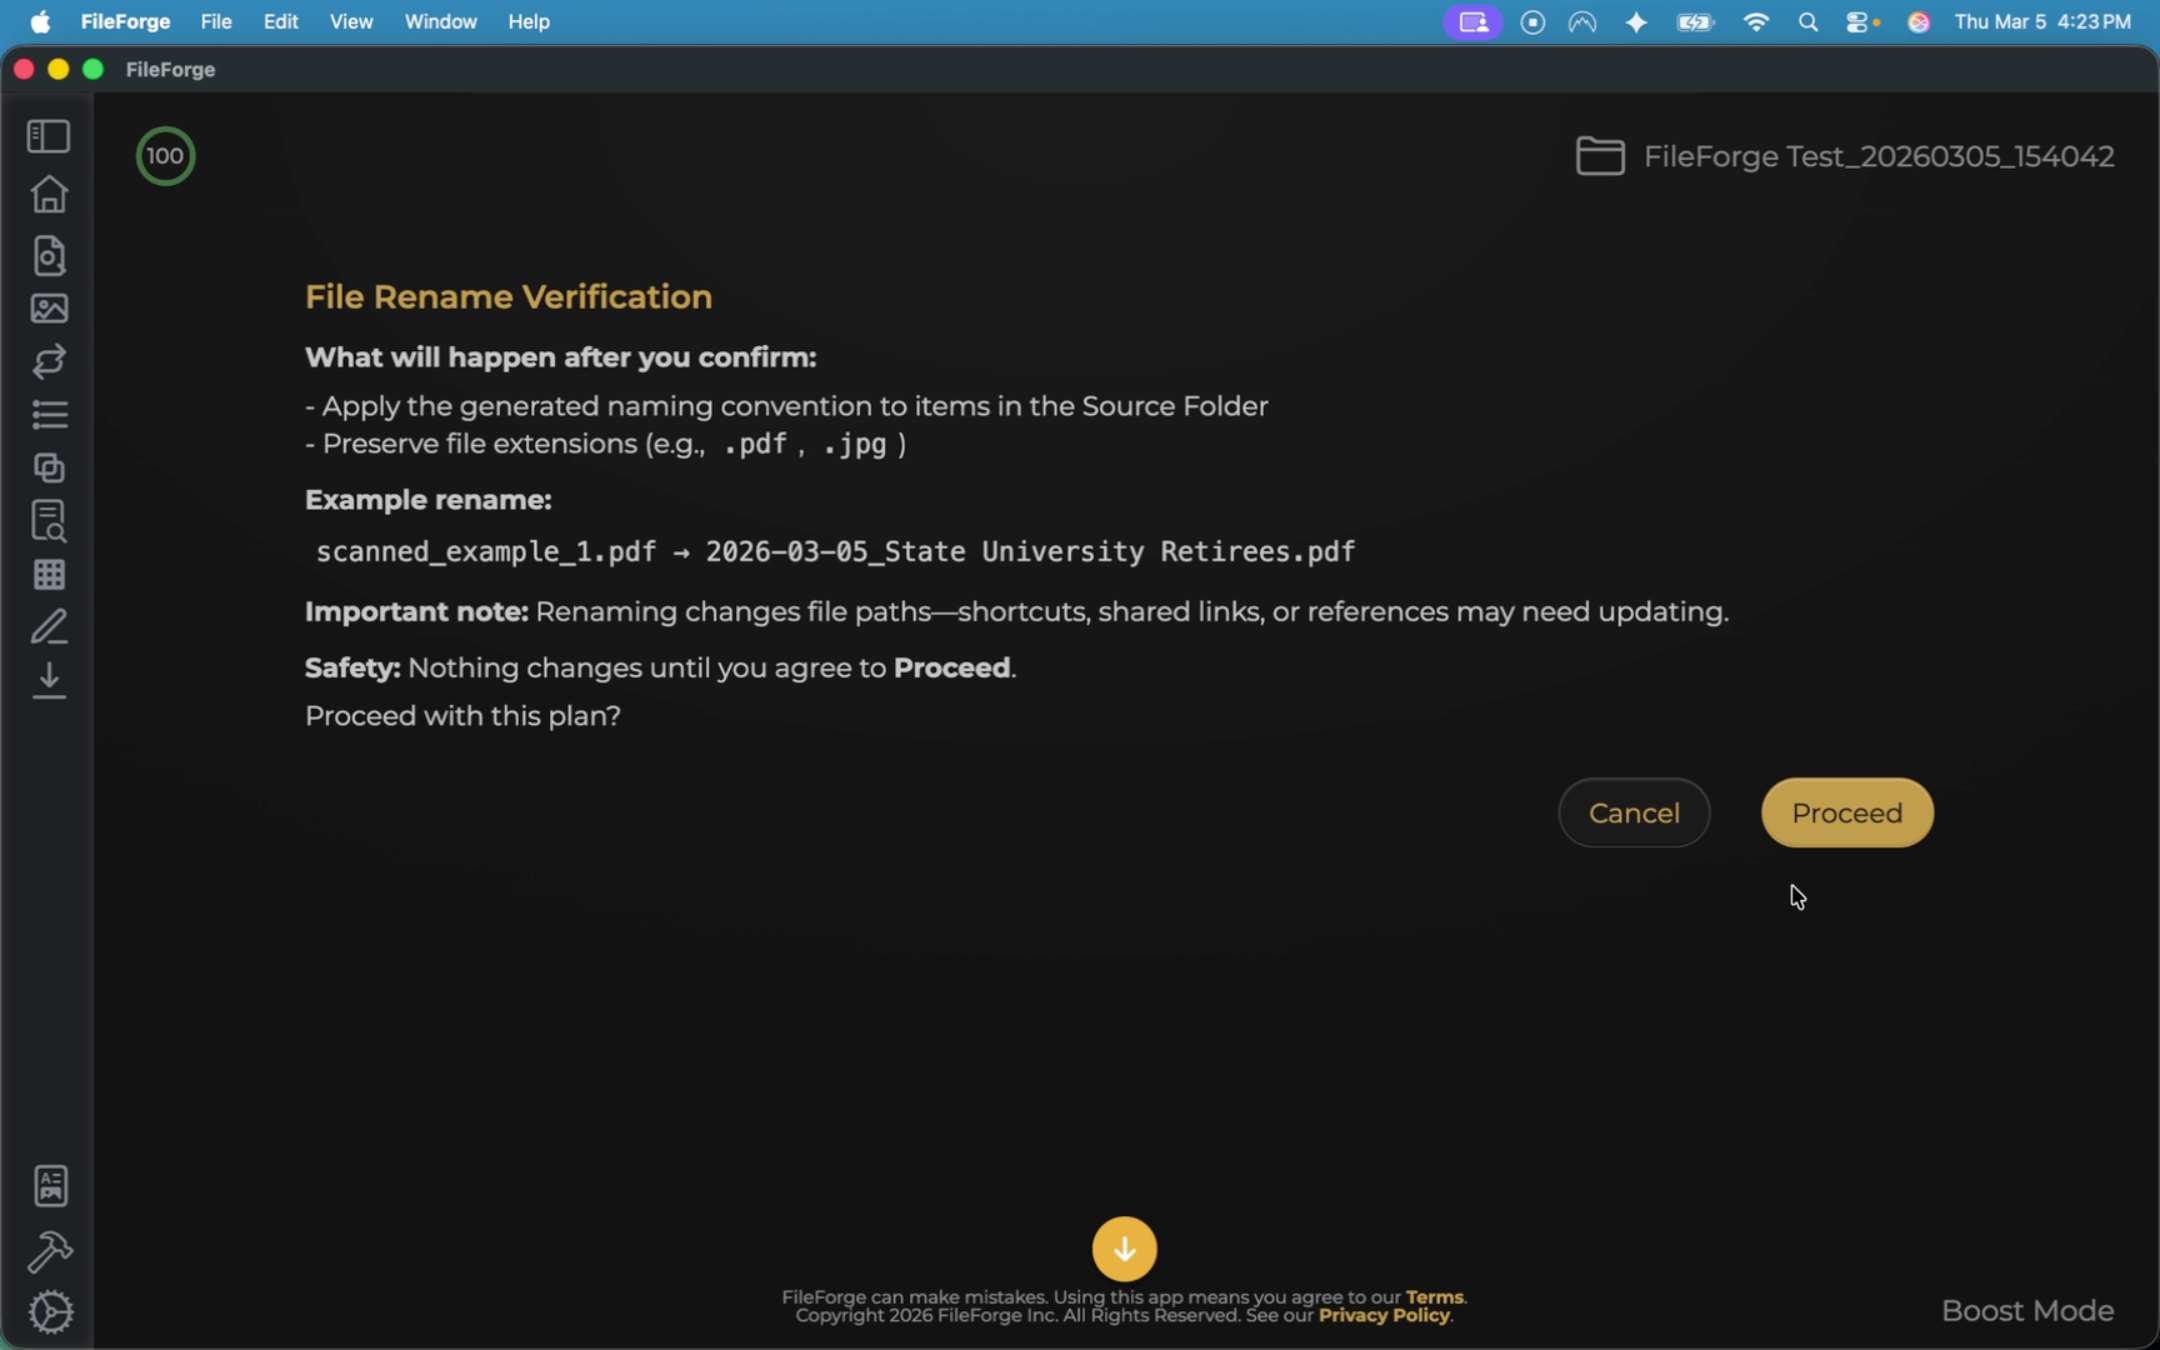
Similar to any action within FileForge, it will give you a preview of what it's going to do before it executes that action. In this example, it's going to translate our files with a readable creation date as well as a three word description of what that file is. Once you are good with the plan, select proceed.
Once the renaming is complete, you can close this out, and re-review your source folder.
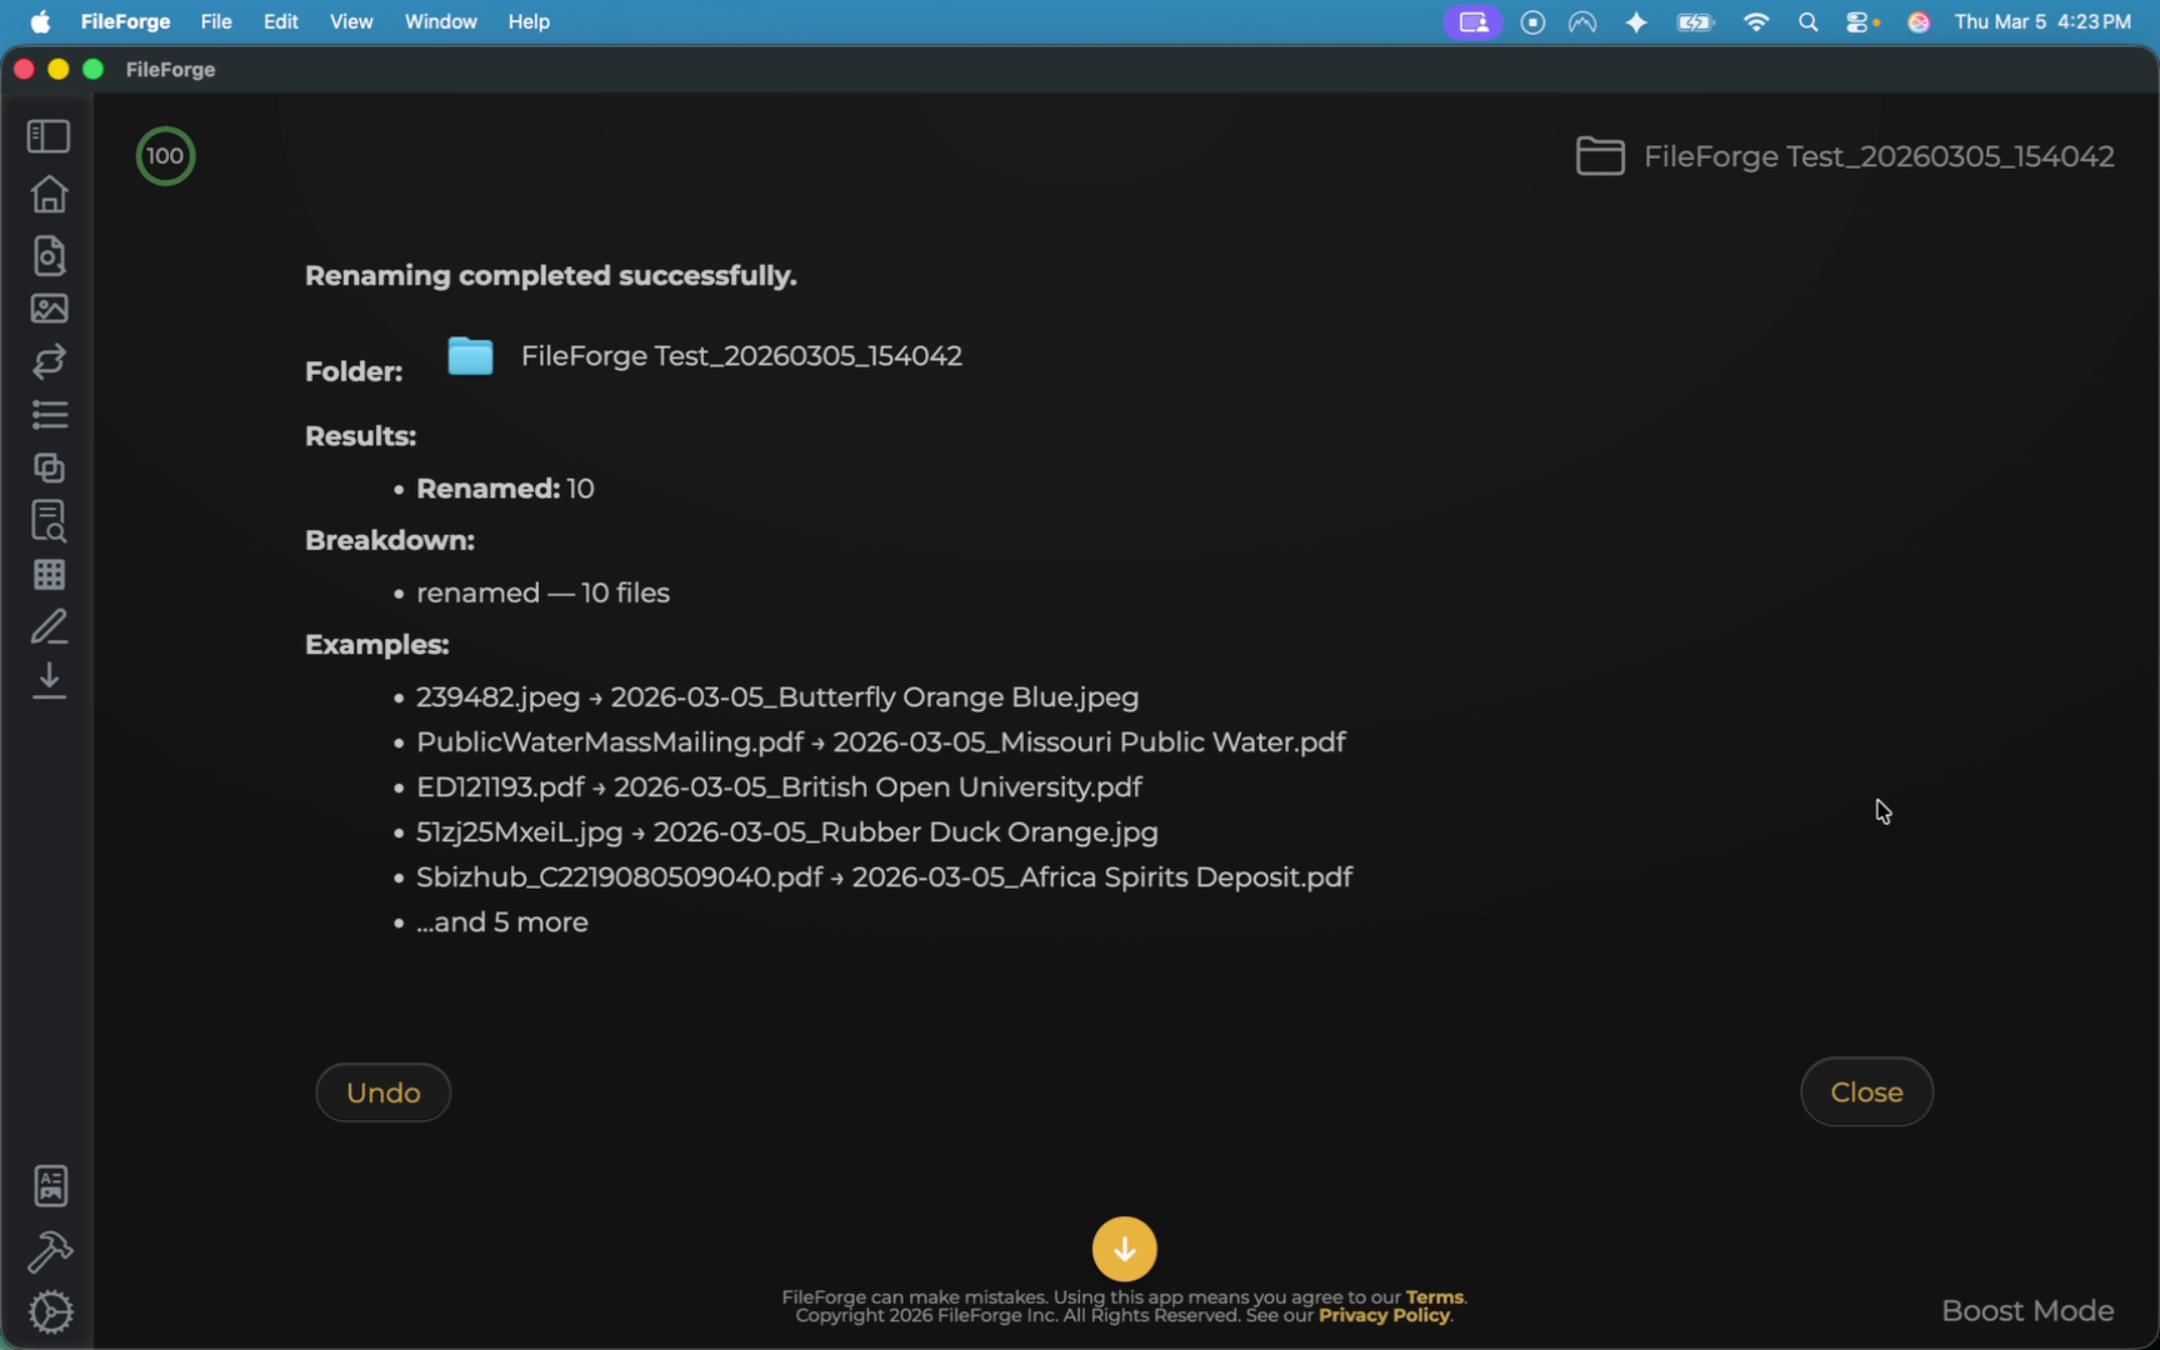
All of the files now follow the format of date created as well as the description.